Irish Guards
HQ - 2x Shermans
3x Shermans, 1x Firefly
3x Shermans, 1x Firefly
4x Stuarts
3x Universal Carriers
2x M10 tank destroyers
Finnish Jalkaväkikomppania (Confident Veteran)
HQ - w/2x shreck
Jalk Platoon (4x squads w/pf)
Jalk Platoon (4x squads w/pf)
Jalk Platoon (4x squads w/pf)
81mm Mortar Platoon (3x squads)
120mm Mortar Platoon (3x squads)
Pioneeri Platoon (3x squads w/pf)
Armored Car Platoon (2x BA-10)
Sturmi Platoon (3x Sturmi)
Straight from the start I knew this would be a very difficult matchup to win based off the sheer numbers disadvantage alone. 8 platoons in a 1500 point game is a tough nut to crack but I'll let the AAR tell the rest of the story.
Deployment
After choosing his side of the board my father choose to keep his sturmi's in ambush and deploy the rest of his infantry on the board to benefit from the prepared positions and the ability to have mobile ambush he could take from one side of the battlefield to the other. After his deployment I saw an opportunity on the right flank objective so I deployed planning to assaut the right flank but keep enough mg's in the middle of the board to stop him from cheating over with help from his other platoons.
 | ||
| British Side after Recon Moves |
 | |||||||||||||
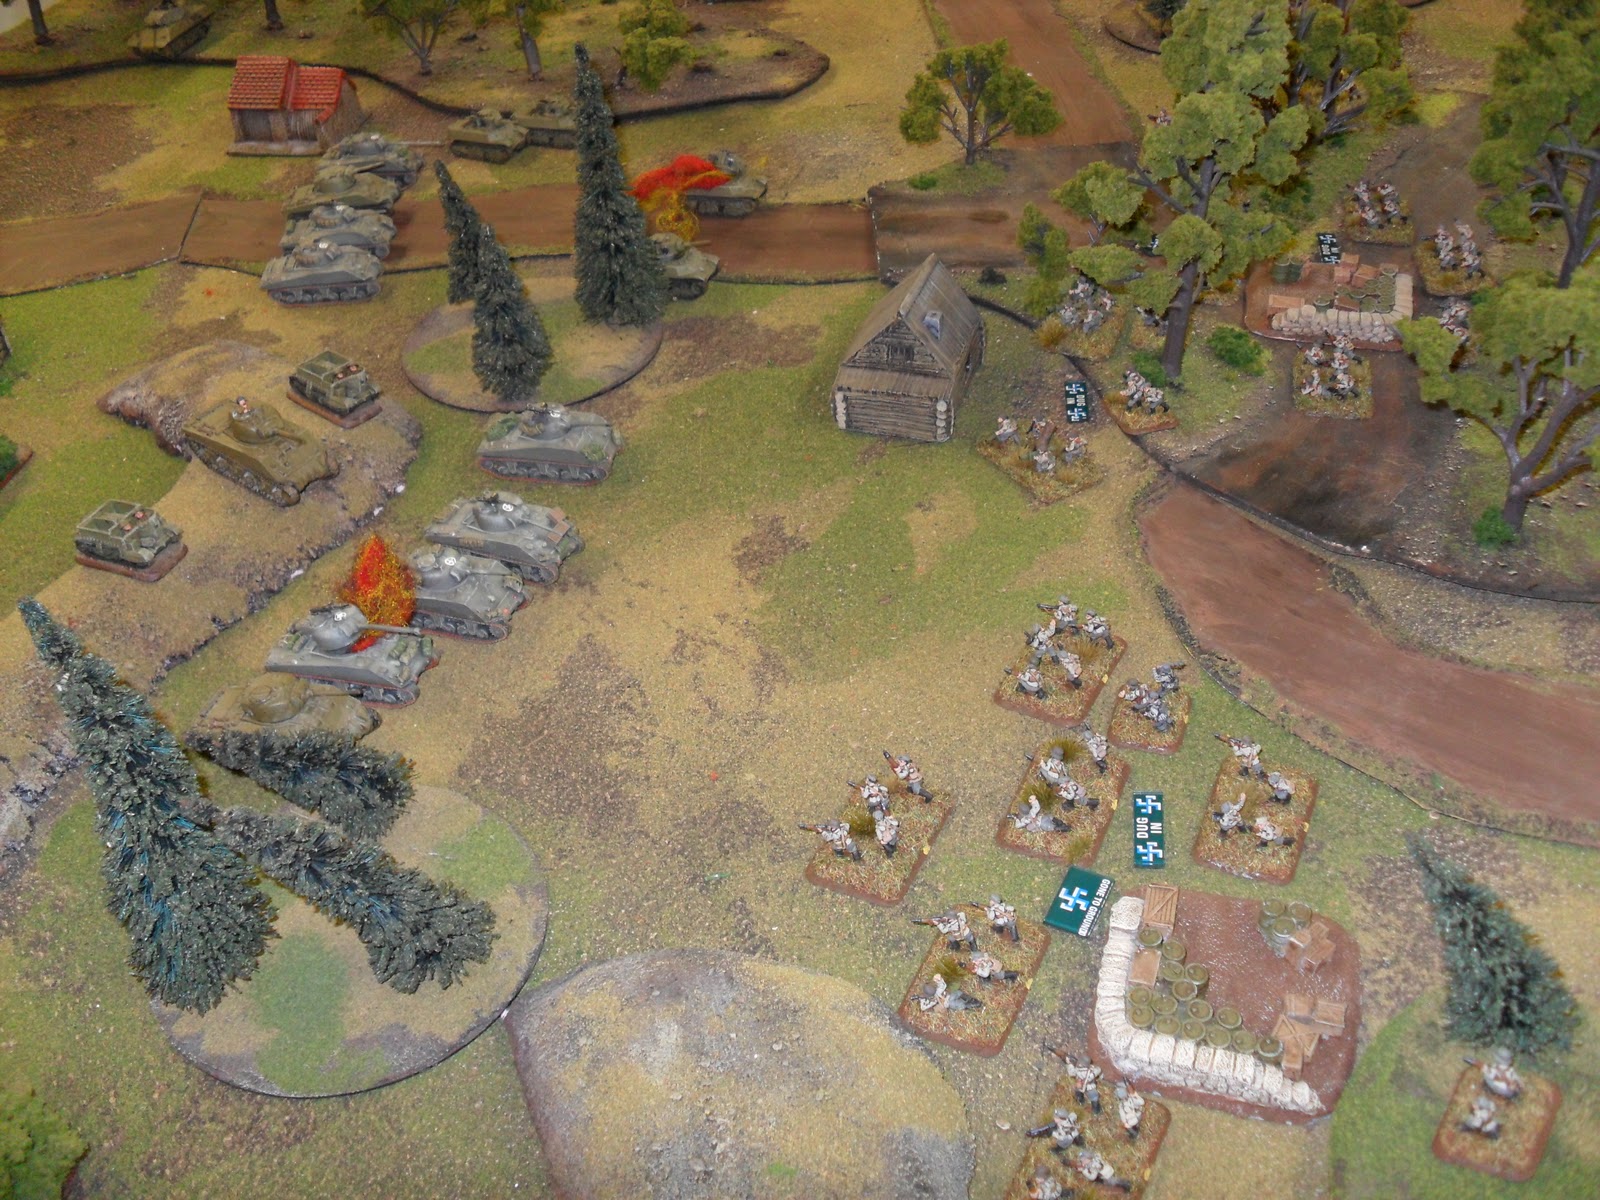
| Finnish right flank and main focus point of my attack |
 | |
| A view from down the center of the map from the advancing stuarts |
Turn 1 was rather uneventful from the British side. I moved my carriers up to the hilltop to get into position to remove gone to ground and decided to take a few potshots while I was at it and actually took a stand from the Finns holdng the right objective. The stuarts moved up closer to center platoon and opened fire with no effect. Both sherman platoons moved forward into position getting ready to strike.
Finn Turn 1
The Finns sneaky deployment caught me off guard as I wasn't observant enough to see the 2 panzershreck teams holding down the center right of his position. I soon found out the error in my ways when a Panzershreck team along with a 120mm mortar bombardment did a number on my stuarts taking out 2 of them and forcing me to disengage stalling my attack for several turns.
 | ||||
| The smoking stuarts after a well placed panzershreck shot and combined bombardment |
After being forced to disengange I had to make a few changes to my initial plan to assault the right flank with both sherman platoons. I decided to hold a platoon in the middle to cover my advance. I used the carriers on the hilltop to remove gone to ground and open up with my main guns on the jalk platoon covering the right flank. After a few saves and no casualties the Finns were hardly worried.
Finn Turn 2
The Finns decided to pop their Sturmi ambush on turn 2 just behind their infantry on the right flank. They were just outside of 16 inches and decided to take 6 shots at long range as opposed to 3 short. They hit with 2 and was able to gun tank the Firefly and knock it out of commission.
 | |
| The flaming Firefly. Just out of the picture to the right are the 3 Sturmi's |
I decided to take advantage of my semi-indirect fire on the right to knock out the Sturmi's and after 10 shots I managed to destroy 1. My M10's held down the left flank with .50 cals blazing on his dug in position. The stuarts lifted gone to ground on the panzershreck teams in the center and the 2nd sherman platoon opened fire with their main guns scoring a few hits but the shrecks shrugged them off saving each.
Finn Turn 3
Since he had to remove a team Bob chose to remove his armored car platoon as they were hiding from my firepower all game anyways and would only be easy victory points if engaged. His Sturmis returned fire on my shermans and also ranged in his 120mm mortars on the same platoon managing to bail out 2 shermans. His infantry still waited patiently in their foxholes for the british advance.
Brit Turn 4
I opened fired once more on the sturmis knocking out one more and forcing a motivation test. Even the fearless Finns knew it was time to get out of there as they failed their motivation and broke. I moved the M10's through the woods to help support the middle as I prepared for my push on the right flank.
Finn Turn 4
Bob had to remove a 2nd platoon this turn so he choose the 81mm mortars. Since I moved my M10's he decided to pull his pioneers from the far left flank to try and support the middle in case the right flank gets out of hand. He ranged in yet again with his 120mm mortars and bailed 2 more shermans on the right flank.
 | |
| A view from the right British flank. You can see the 2 Sturmi's smoking in the background. |
This turn was my make it or break it turn knowing that if I didnt push him off the objective he would remove it next turn and with the map layout it would be near impossible to capture either of the others. I bailed in both my shermans and moved them up for the assault on right flank objective. I used eyes and ears with the carriers and unloaded 16 mg shots hoping to pin his anti-tank teams and came up 1 hit short. I was able to pin down the panzershrek teams with my stuarts and 2nd sherman platoon though. I made my assault but 1 sherman got bailed in defensive fire leaving me with just 3 tanks. I killed 2 stands and he wisely backed off but was still able to contest the objective. 1 more hit and it would have been a morale check and possibly the game.
Finn Turn 5
Bob decided to remove his pioneer platoon considering the game was virtually all but over since his fins held off the right flank assault. His 120mm mortars again opened fire bailing out 2 more shermans.
 |
| The Brits made the push they were looking for but just 1 turn too late |


Hope you all enjoyed my first AAR!
Cheers,
Johnny Utah
Dude, seriously gorgeous terrain!
ReplyDeleteGreat first AAR, kudos!